Free skill: how I use Fable 5.2 to film a clash-free MEP install, from 2 images
1 skill file, 2 images of an empty building, and a 30-second film of 4 trades of services installing themselves, clash-free.
I gave Claude Code 2 AI-generated images of an empty commercial building and 1 paragraph describing the services. It came back as a Blender model with 4 trades of services installing themselves as the camera walks through, checked for clashes, then cut down to a 30 s film with a Lego click on every piece that lands. Last, I ran the film through Seedance for $2.50 and kept only its 2 ends, so the film opens and closes photoreal. Then I asked Fable 5.2 to review its own film, and it found 7 clashes the first check could not see. These are my prompts in order, what came back, what I said no to, what it all cost ($50), and the skill file, free to download.
Download /mep-walkthrough (zip, 61 KB) mep-walkthrough.zip · SKILL.md · 12 example scripts · free, no gate- I started with 2 images and an empty shell
- Then I described the services, trade by trade
- I said no to blocks
- My notes on the first film
- I asked for a drawing to open on
- The ending
- Last: 2 s on the drawing, 30 s overall, and sound
- Then I made the ends photoreal
- Then I asked Fable 5.2 to review it
- What's in the skill
- What it cost
- Where the judgement sat
- What I would tell you before you copy it
01I started with 2 images and an empty shell
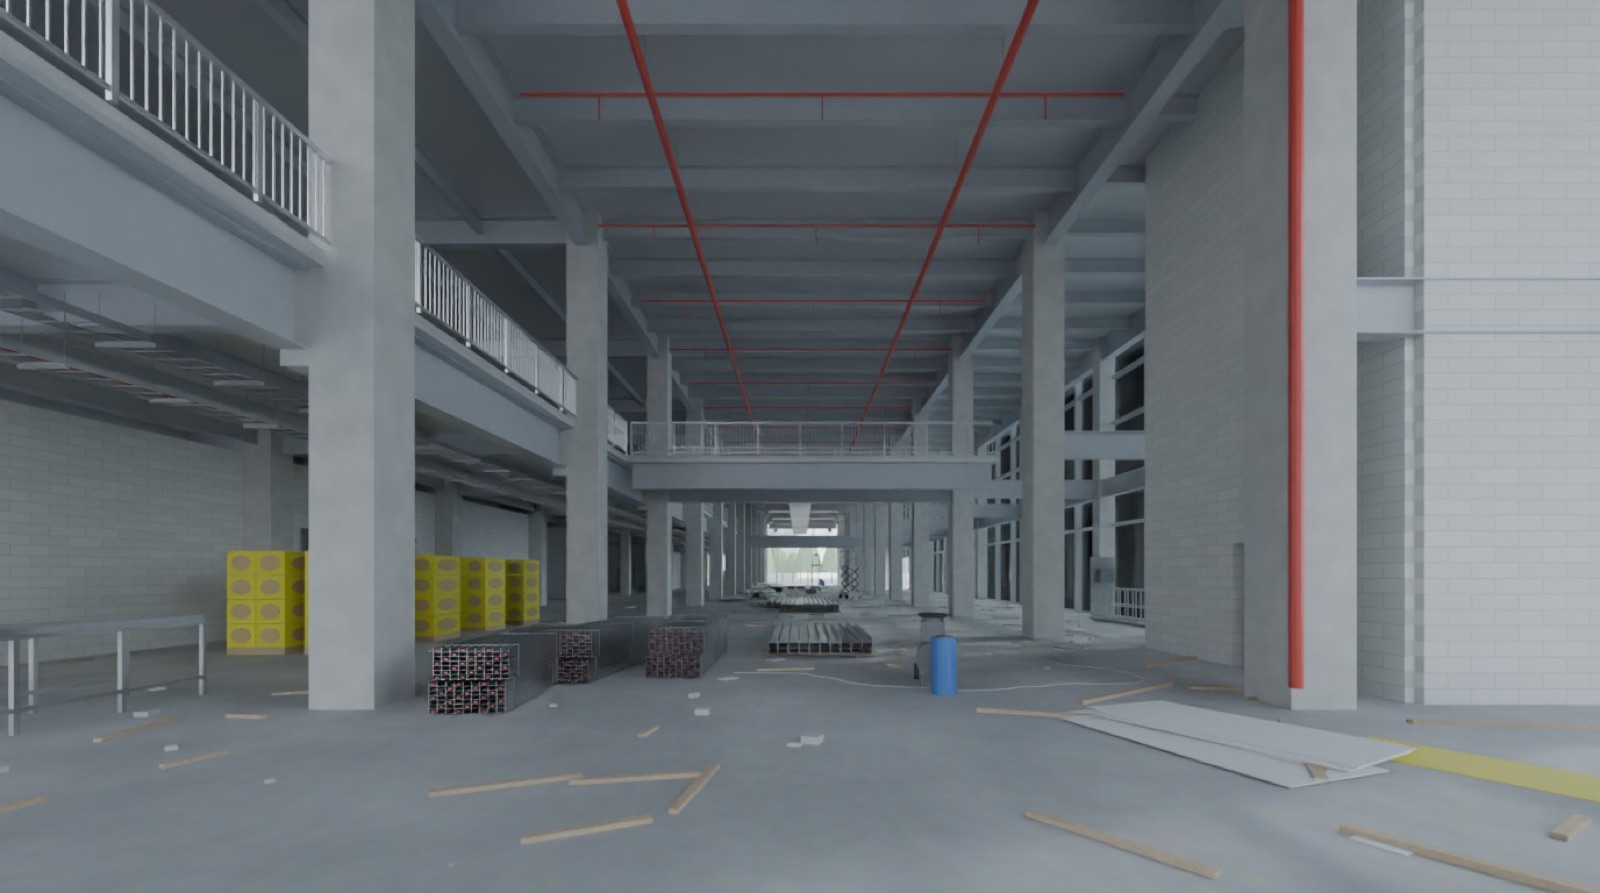
The building doesn't exist. I had 2 AI-generated images of a long, 2-storey commercial shell, 1 from the front and 1 from the back, and I wanted to see if I could fit it out.
This was the first prompt. (I've fixed typos in my prompts. Otherwise they're exactly as I typed them.)
Use these 2 shots as reference. They are AI generated. They represent the front and back view of a long linear commercial building. Model it in Blender as an empty shell first. Accurate, and include construction materials on the floor etc.
It read the grid, the 2 floors, the cores, the bridges and the curtain wall off the images, and lined its own cameras up with them so I could compare the model with each image.
02Then I described the services, trade by trade
While the shell was building, I sent the brief for the film:
16:9 video, 30 seconds. Camera walks through from the far end of the building towards the other end. Progressively you can see different mechanical, electrical and hydraulic services being installed. They just appear in place where they are supposed to be. Colour coded:
1. Greens: mechanical services, including supply air fan, toilet exhaust, a glass enclosed lift, fan coil units with horizontal ductwork, then flexible duct to the diffusers. Diffusers spaced equally and logically.
2. Reds: fire services, sprinklers and their pipework.
3. Yellows: electrical services, cable tray on the ceiling, surface mounted to the structure, all directed to a central vertical shaft. Light fittings in the ceiling space (no ceiling model, only a ceiling datum). Spaced equally and logically.
4. Blues: hydraulic services, cold water to the toilets from the ceiling, then the sewer pipework.
It should look like a professional BIM model while walking through, but with shadows cast. No clashes between services at all. No ceiling, wall lining or partitions other than the building shell.
The last 2 lines are the ones that shaped the build. "No clashes at all" became 2 things. First, every trade gets its own height band under the ceiling, so horizontal runs can't meet. Then a clash check runs at the end of every build: every service item against every other trade and every piece of the shell. It found 22 real clashes on its first run. At the end of the first build it reported 0 across 15,264 service pieces and 3,131 pieces of shell, and nothing gets rendered until it does.
03I said no to blocks
The first services were coloured boxes in the right places. My note:
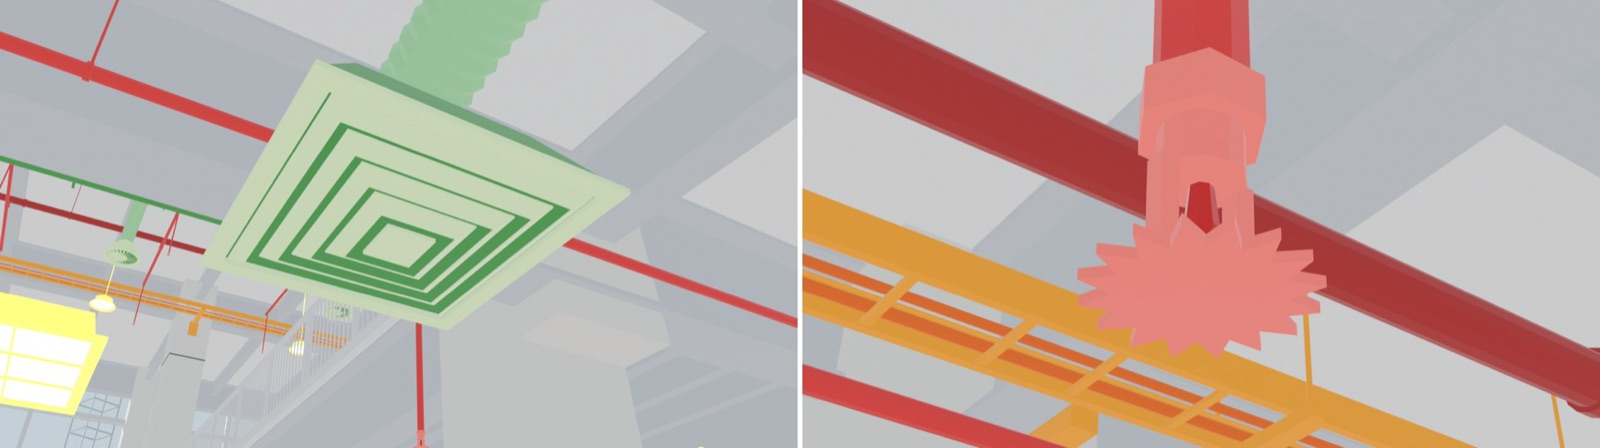
Some of the mechanical, like diffusers, just look like a block. I need it to actually look like an aircon grille. All equipment needs to be geometrically realistic.
It came back with louvred 4-way diffusers, swirl diffusers, egg-crate grilles, fan coil units, corrugated flexible duct that droops between hangers, pendent sprinkler heads with their deflectors, and ladder tray with cables in it. Each one sits inside a box the clash check sees, so the detail never changes the routing.
04My notes on the first film
The first film had 3 problems, and I sent them in 1 message. It was washed out. The services were installing too far from the camera to see it happen, which is the whole point of the film. And the first floor ceiling had nothing on it.
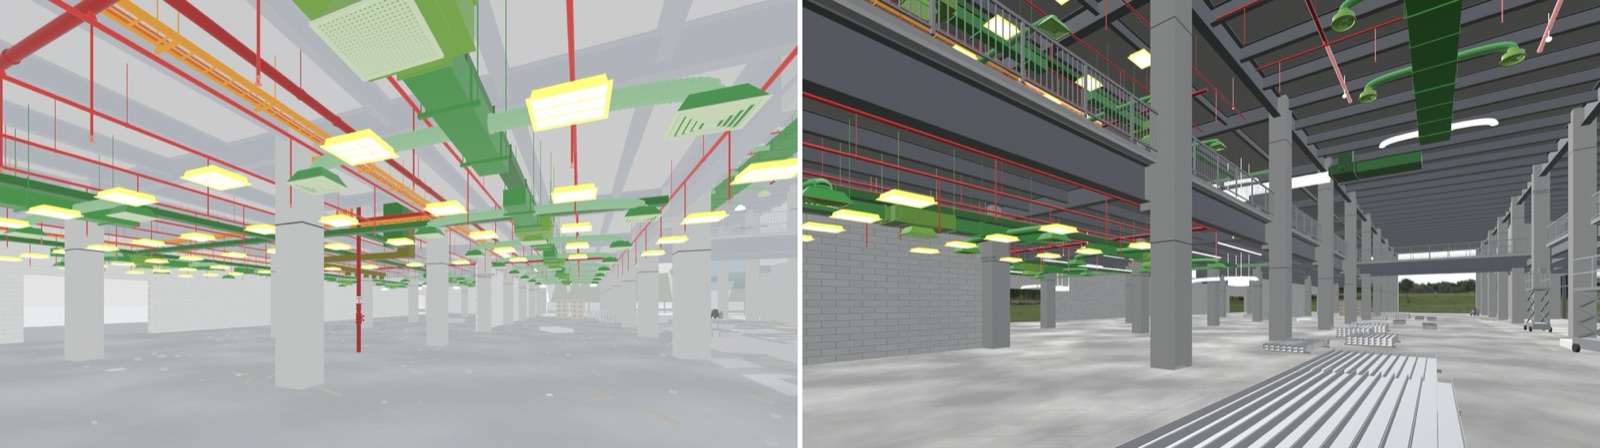
The fix for the distance was the most useful number in the project. Each item now lands between 6 and 26 m ahead of the camera, mechanical furthest and hydraulic closest, instead of up to 50 m. Each one also rises the last 0.8 m into place and flashes white as it lands, so your eye goes to it.
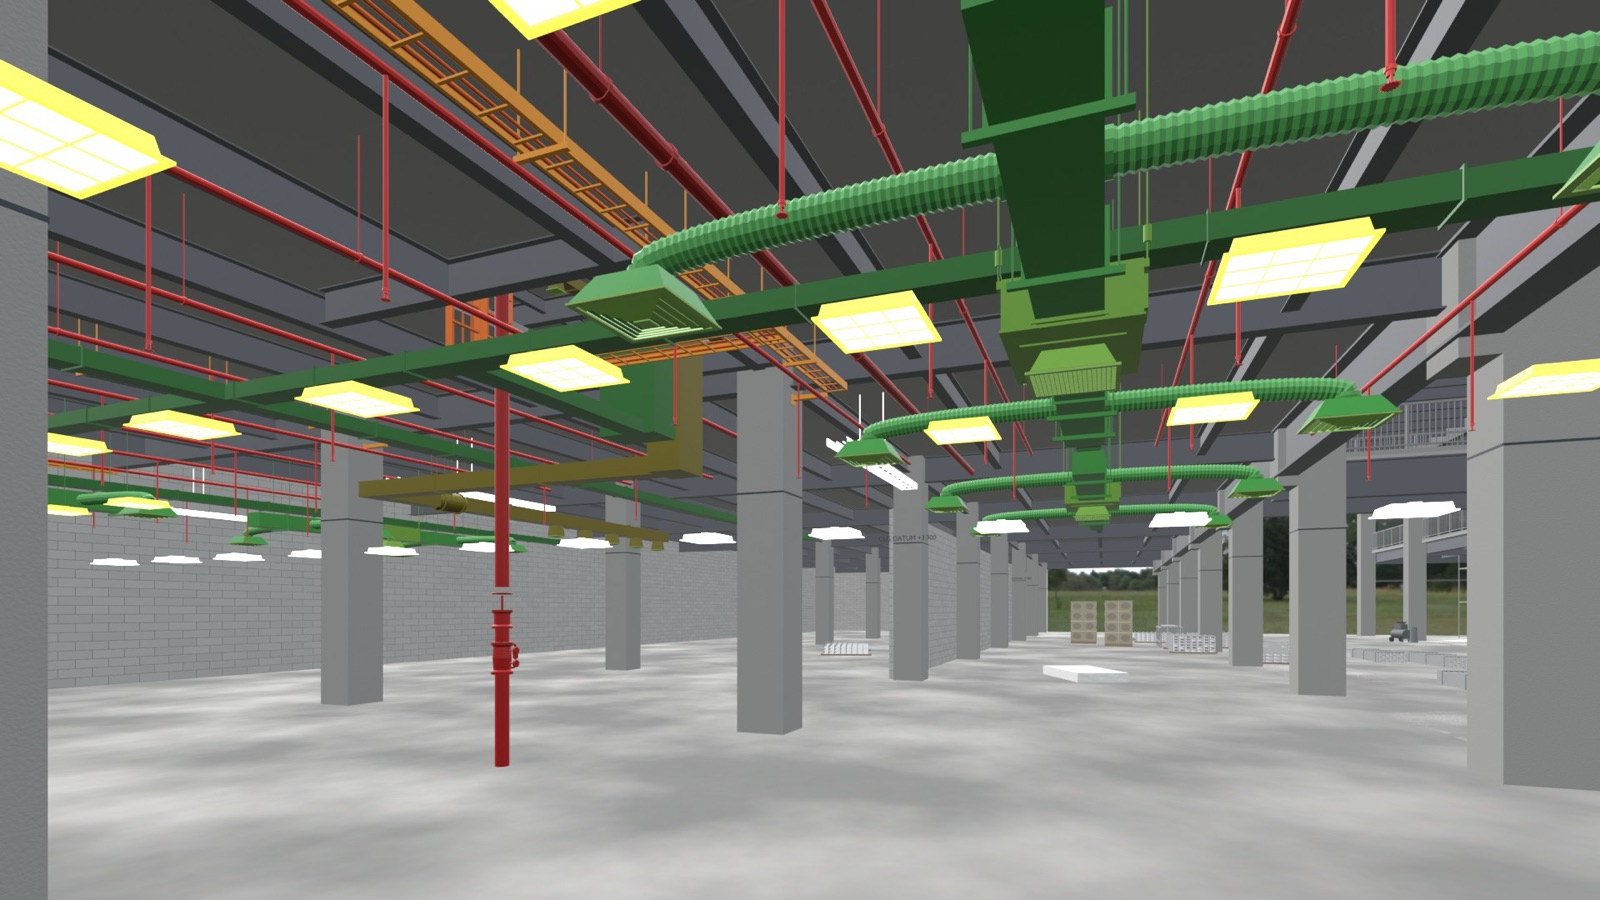
The rest of my notes were about the building, not the services:
Brick corner looks wrong. Also the steel beam should not be buried inside the bricks.
It appears like the beams are connected to nothing on the right.
There should be like a slab here.
I don't like the debris on the floor. Remove it. Keep the construction materials.
None of that is MEP. But a services engineer watching this would stop trusting the services the moment a beam ended in mid-air.
05I asked for a drawing to open on
I wanted it to start the way a site walk starts:
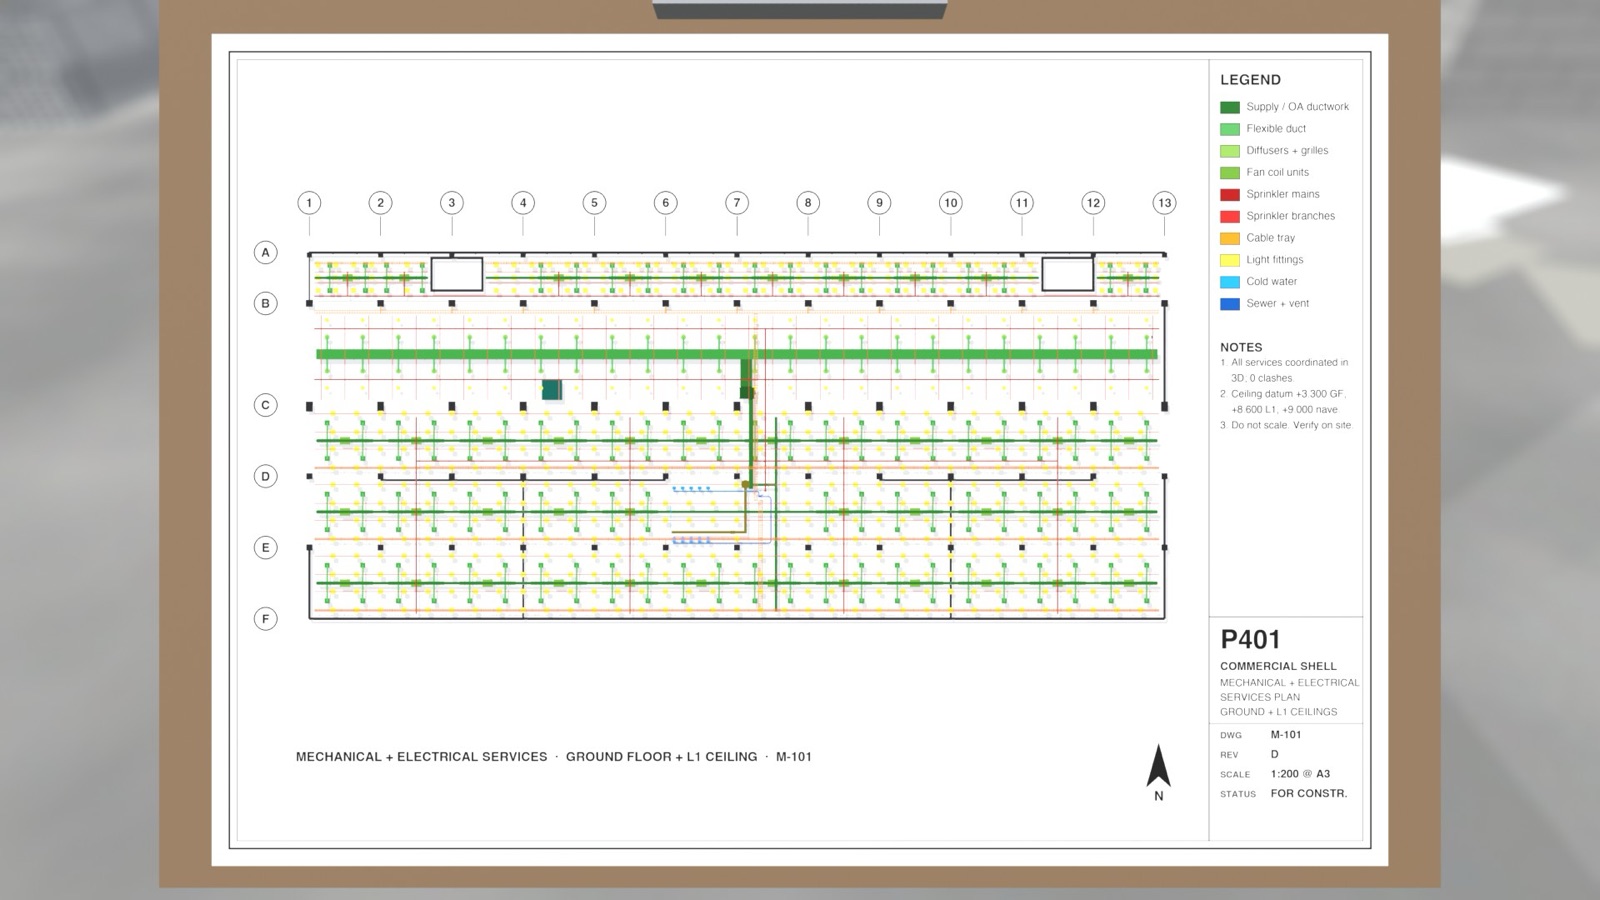
Start from a POV view of a person holding an M&E drawing. The POV of the camera eases into a forward moving shot of the construction site, with services starting to appear.
My first version had the drawing low in the frame and too small to read. So:
Start frame should be filled with the drawing, around 85% of the frame, so we can clearly see the drawings.
The drawing is a top-down render of the model's own services, laid out as an A3 sheet with grid bubbles, a legend and a title block. So the plan on the clipboard matches what installs.
06The ending
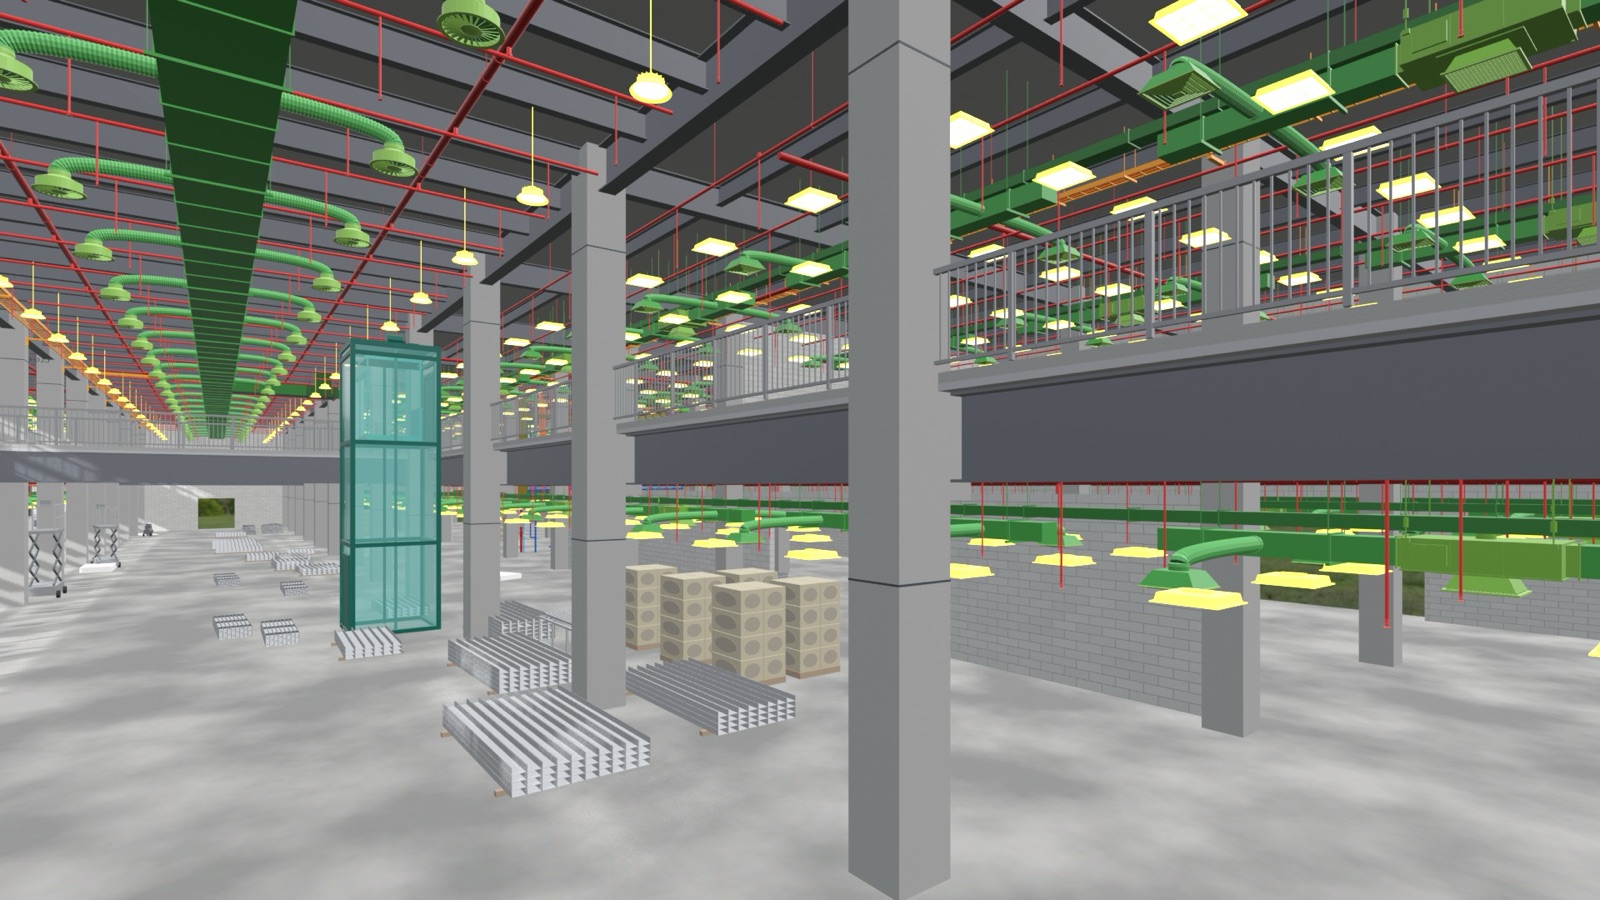
I asked for the open end wall to be enclosed with full-height glazing before the walk stops ("mullions should have more vertical than horizontal orientation", at 150 x 50), then a 5 s turn of 180 degrees to a symmetrical view back down the finished hall.
That turn showed a gap. The strip between the last grid line and the facade had nothing in it:
There should be M&E installation on this side of the building too. Both floors.
It fitted the strip out on both floors around the beams, rechecked to 0 clashes, and reissued the drawing as revision D so the clipboard matched.
07Last: 2 s on the drawing, 30 s overall, and sound
My final notes were "drawing should be for 2 sec only", "make the process faster", "add sound effects, Lego clicking sound", and another cut at 30 s.
It didn't rebuild the animation. It remapped the 40 s master onto 30 s and rendered the new in-between frames, so the walk stays smooth and the install speeds up with it. The clicks come from the model itself: each service item's landing time, about 1,100 of them, gets a recorded Lego click, pitched by trade (ducts low, glass high).
08Then I made the ends photoreal
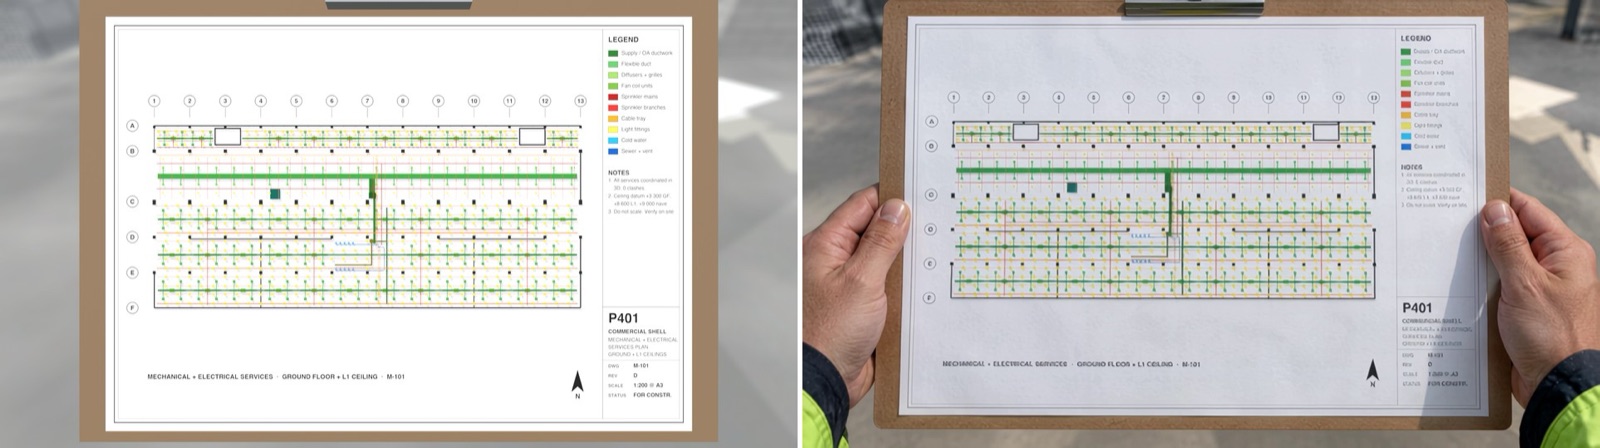
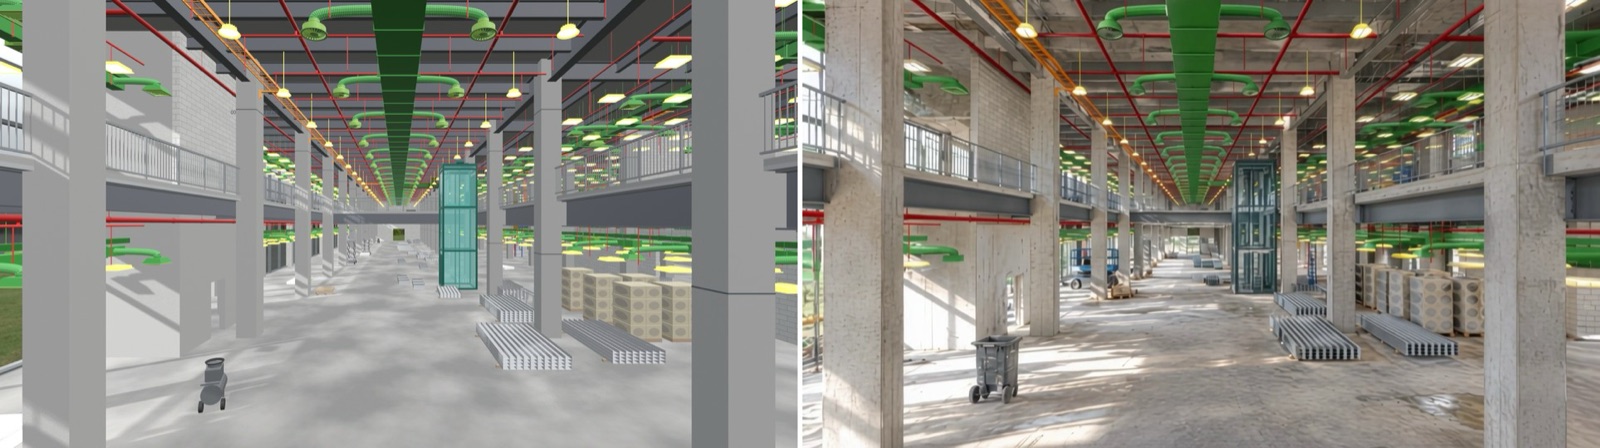
I ran the 30 s cut through Seedance as a video-to-video pass. It cost $2.50, and most of it couldn't be used: through the middle it drifted off the building and invented its own. But the first 2 seconds had real hands holding the drawing, and the last second had a real-looking hall. So:
I want to make the start of the video photorealistic and then transition into our video. And at the end of the video, transition back from our model into the AI video.
The useful surprise was that the Seedance clip kept our timing frame for frame at both ends. Frame 54 of its video matched frame 54 of ours. So the cut is just 2 dissolves, with no camera jump: photoreal for the first 2.6 s, into the model as the clipboard leaves the shot, and back to photoreal for the last second.
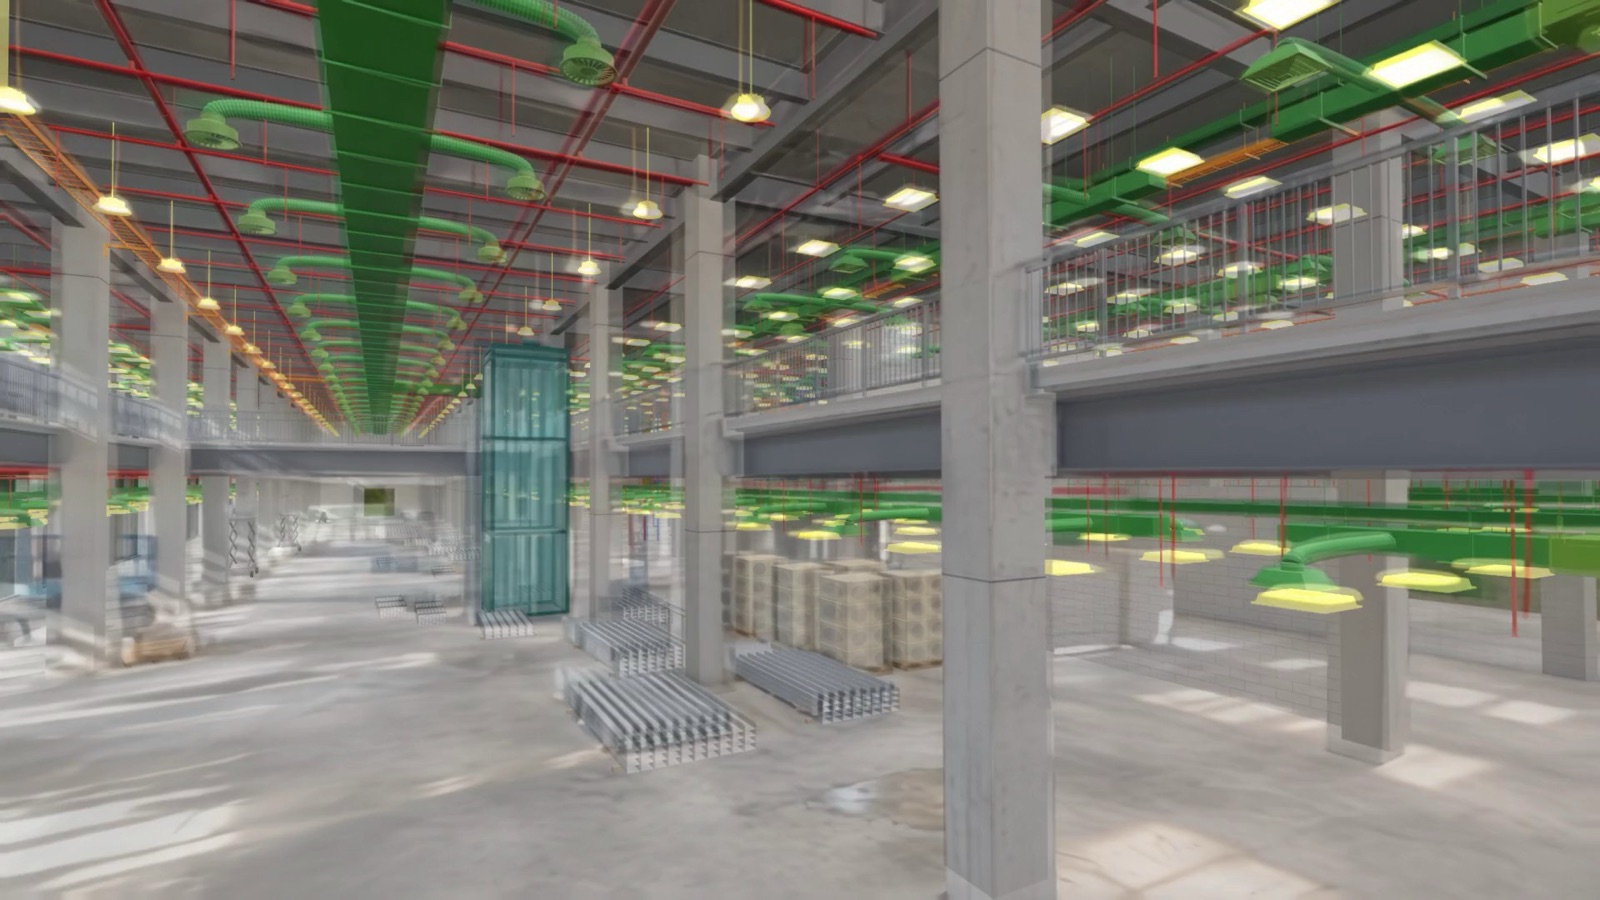
My first try at the end didn't line up:
28th second transition not quite aligned. Can you try to align it?
The Seedance camera turns a little faster than ours, so at 28 s you saw 2 sets of columns and 2 lifts. It moved the dissolve to the half second where the 2 cameras had caught up, measured how far off each frame was, and warped both images onto each other while they cross. Now each column and the lift show once.
09Then I asked Fable 5.2 to review it
With the film finished, I pointed Fable 5.2 back at the same folder:
As Fable 5.2, suggest improvements to the model and the final video. Showcase any new intelligence.
It watched the finished film 2 frames a second, read the build scripts, and came back with a list. 4 of the points were about the model, and they were the ones a services engineer would have raised.
The install order was upside down. Items landed by trade, mechanical first. So the ductwork went up, and then the sprinkler mains and cable tray were threaded in above it. Nobody builds a ceiling void that way. It now fills from the top down: risers, tray, sprinkler mains and branches, cold water, sewer, outside air, fan coils and duct, and last the diffusers, lights and heads at ceiling level.
The toilets had no walls. Basins and pans hung off cold water drops in an open floor, and the alarm valve stood alone on the slab. My brief had said "no partitions", so that was mine. It added them as unlined steel stud frames, because first fix happens before the lining goes on. You can still see every fixture and riser through the studs.
The clash check had a blind spot. It tested services against structure and walls, but not against the site stock on the floor. Widened to include it, the check found 7 real clashes that had been in the released film: the ropes of 2 parked gondolas and the posts of a scaffold tower ran straight up through the sprinklers, tray, a diffuser and a light. It removed the ropes and cut the tower to 1 lift.
Nobody had checked access. It added a second check for the space under each of the 88 fan coil units, so the filter can be reached through the ceiling. 1 unit had a light under it on both floors.
The model now reports 0 clashes across 15,262 service pieces and 6,066 pieces of shell and site stock.
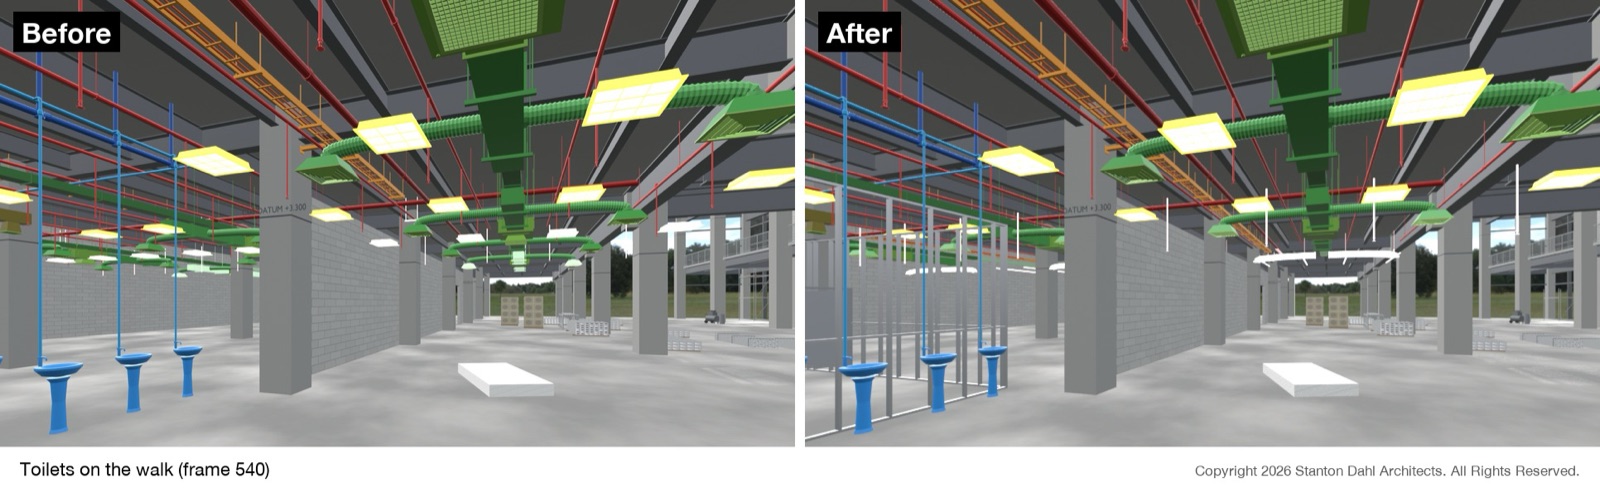
The part I liked most: it also withdrew 1 of its own findings. It had flagged that the 1.2 m wide main duct would shadow the sprinklers above it. When it went to fix that, it read the heights, found the heads already hang below the duct, and told me it had been wrong.
I kept the original Seedance clip for the 2 ends. The camera didn't change, so the same dissolves still line up.
10What's in the skill
Download /mep-walkthrough (zip, 61 KB) mep-walkthrough.zip · SKILL.md · 12 example scripts · free, no gateThese are the rules worth stealing, all from the notes above:
1 height band per trade. Under a 5.4 m soffit: diffusers 3.3 to 3.5, fan coils and supply duct 3.5 to 3.8, outside air 3.9 to 4.0, sewer 4.0 to 4.3 at 1:100, cold water 4.35 to 4.4, sprinkler branches 4.4 to 4.5, mains 4.5 to 4.7, cable tray 4.7 to 4.8.
A clash check after every change. Not once at the end. Every move I asked for could have created a new clash, and some did.
Install where you can see it. 6 to 26 m ahead of the camera, with a short rise and a flash.
Install from the top down. Lead distances go by height band, not by trade: the highest services land first, the ceiling terminals last.
Check the clash check. Ask what it does not test. Mine skipped the site stock and the access zones.
Every zone, every floor. Walk the plan strip by strip, including the strip behind the last grid line.
Build long, cut short. A 40 s master can become a 30 s or 35 s cut without touching the model.
Salvage the AI pass, don't fight it. If a video-to-video pass drifts, keep the frames where it still tracks your film and dissolve on those.
11What it cost
Every call Claude Code makes is logged with its token count, so this is counted, not estimated. The prices are the API rates it ran at: $4 per million input tokens, $20 per million output, $8 per million written to the cache and $0.20 per million read back from it.
The shell, the services and the first film, in 1 session:
- 263,000 output tokens: $5.25
- 761,000 tokens written to the cache: $6.09
- 16.3 million tokens read back from the cache: $3.26
- Total: $14.60
Everything after that, from my first notes to the 30 s cut with sound:
- 227,000 output tokens: $4.54
- 2 million tokens written to the cache: $16.36
- 45.5 million tokens read back from the cache: $9.10
- Total: $30.00
Altogether: 65 million tokens over 254 calls, $44.60.
The review and rebuild came later and is not in these figures.
The photoreal ends: $3.19 in tokens to find the matching frames and build the 2 dissolves, plus $2.50 for the Seedance clip. Writing this up and packaging the skill was another $3. About $53 in all.
Half of it is the cache writes. The renders ran for 1 to 2 hours each, longer than the cache lasts, so every time I came back with a note, the whole conversation was written to the cache again. The fix is the same as last time: short test stills, and batch the notes.
I'm on a Claude subscription, so for me it came out of the plan rather than as a bill. The rendering ran on my own Mac and isn't in those figures.
12Where the judgement sat
AI did the making: the shell, about 15,000 service pieces, the routing, the clash check, the camera, the drawing sheet, the renders, the sound and the photoreal pass.
It also did the review: Fable 5.2 found the install order, the missing walls and the 7 clashes without being told where to look.
It didn't decide that blocks weren't good enough, that the install had to happen close enough to see, that a beam can't end in air, that a strip behind the grid line was missing services, or which 3 seconds of a $2.50 AI clip were worth keeping. I did.
13What I would tell you before you copy it
This is a coordination film, not a services design. The layout is logical and clash-free, but nothing is sized from a calculation. There is no duct sizing, no hydraulic or sprinkler design to the standards, and no load on the cable tray. A services engineer would still design the real thing.
The clash check is box against box. It's strict enough to keep the film honest, but it isn't a replacement for a federated model clash check in a BIM tool.
The building is AI-generated, so there's no real project behind it to be right or wrong about. The photoreal ends are AI too: they look real, but nothing in them was measured.
The skill file is free to download: chiangning.net/downloads/mep-walkthrough.zip. Unzip it into your Claude Code skills folder, give it a building, and ask for an MEP install walkthrough. It includes the 12 scripts that made this film. Bring your own click sound and music.
Building: 2 AI-generated reference images. Photoreal ends: a Seedance video-to-video pass over the film. Sky: approaching_storm HDRI from Poly Haven (CC0). Music: cinematic-documentary (Pixabay). Sound effects: recorded Lego clicks.
Built with Claude Code (Fable 5.2) and Blender.
Copyright 2026 Stanton Dahl Architects. All Rights Reserved.